Input
The Input Node is the default trigger point for workflows that are invoked programmatically via API calls. It accepts any JSON payload, making it the most flexible trigger option for custom integrations, external system calls, or workflows triggered by other workflows. Unlike specialized trigger nodes (FormSG, CFT, ApplySG), the Input Node requires no additional configuration — simply provide your input data when calling the API endpoint.
Note: The Input Node is designed for API-based workflow execution. For an overview of all trigger nodes, see Configure Workflow Trigger.
How Does It Work?
The Input Node acts as a generic entry point that receives HTTP POST requests with JSON payloads. It is ideal for workflows that need to be triggered from custom applications, scheduled jobs, or other automated systems.
Prerequisites: You need an access token to authenticate API requests. See Access Token Management for instructions on generating tokens. External systems calling the Input Node must also be whitelisted — refer to Network Requirements for details.
Setup Steps:
- Click on Select Input
- Choose Input as the trigger node (this is the default option)
- Open the trigger node Settings to view the configuration
- Copy the webhook endpoint URL provided by the trigger node for your target environment (staging or production)
- Configure your external system to call this endpoint with a POST request
- Publish your workflow to activate the trigger
- Send POST requests with JSON payloads to trigger the workflow
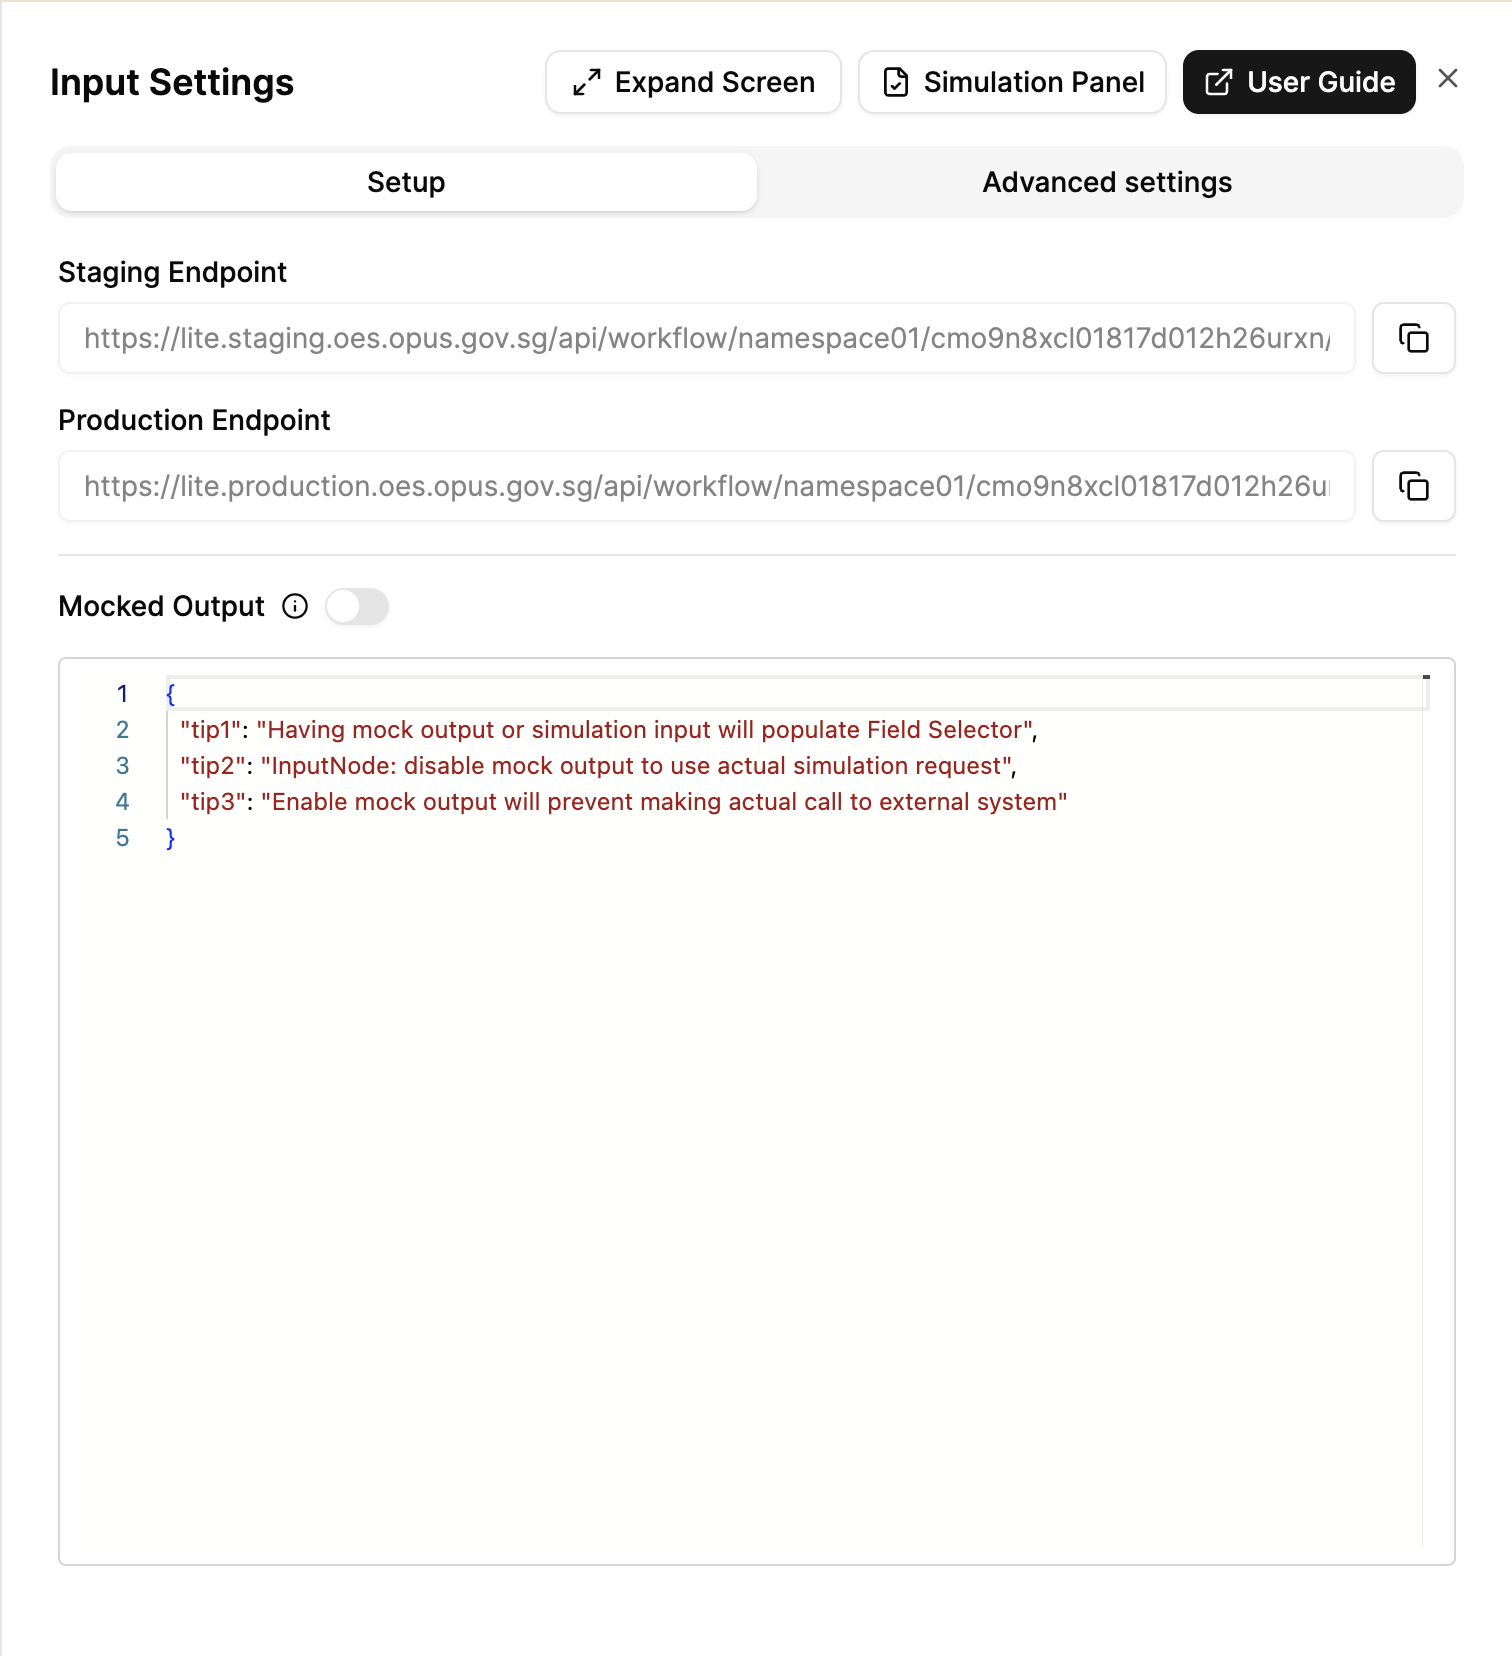
Runtime URL
The trigger node provides runtime URLs for invoking your workflow in different environments:
- Staging URL: Used for testing in the staging environment
- Production URL: Used for live production workflows
The URL format indicates the specific branch or release version:
mainbranch for development- Release versions (e.g.,
release/1.0.0) for production deployments
Note: The endpoints below are for Lite tier reference only. Always refer to the endpoint URL shown in your node settings.
| Environment | Endpoint URL |
|---|---|
| Staging | https://lite.staging.oes.opus.gov.sg/api/workflow/<namespace-id>/<project-id>/<entity-id>?branch=main |
| Production | https://lite.production.oes.opus.gov.sg/api/workflow/<namespace-id>/<project-id>/<entity-id>?branch=main |
Query Parameters:
| Parameter | Description |
|---|---|
branch |
The branch or release version (e.g., main, release/1.0.0) |
identifier |
Optional. Custom identifier that appears in the monitoring page for easier tracking |
Example:
https://lite.staging.oes.opus.gov.sg/api/workflow/namespace01/project01/cmj889fap00ysa401rpsjr98f?branch=mainOutput
The Input Node passes through the entire JSON payload sent in the API request. All fields in the request body become available to downstream nodes.
Example Request:
{
"applicantName": "John Doe",
"applicationId": "APP-12345",
"email": "john.doe@example.com",
"amount": 5000,
"status": "pending"
}Output Structure:
The exact same data is available to subsequent nodes:
{
"applicantName": "John Doe",
"applicationId": "APP-12345",
"email": "john.doe@example.com",
"amount": 5000,
"status": "pending"
}These fields can be accessed by downstream nodes using template expressions (e.g., {{{ data.applicantName }}}, {{{ data.amount }}}).
Flexible Schema: The Input Node accepts any valid JSON structure. You can send simple flat objects, nested structures, arrays, or any combination — the workflow will receive the data exactly as sent.
API Specification
Request Format
HTTP Method: POST
Headers:
Authorization: Bearer <your-access-token>
Content-Type: application/jsonURL Parameters:
| Parameter | Type | Required | Description |
|---|---|---|---|
namespaceId |
string | ✅ | Unique ID of the namespace |
projectId |
string | ✅ | Unique ID of the project |
entityId |
string | ✅ | Unique ID of the workflow with Input Node |
Query Parameters:
| Parameter | Type | Required | Description | Valid Values |
|---|---|---|---|---|
branch |
string | ✅ | Branch name or release version to execute | main, release/<version> |
identifier |
string | ❌ | Optional. Custom identifier that appears in the monitoring page for easier tracking | Any string |
Request Body:
The request body should contain the input data in JSON format. The structure is completely flexible based on your workflow needs.
{
"field1": "value1",
"field2": 123,
"nested": {
"field3": true
},
"arrayField": [1, 2, 3]
}Response
Workflows return an execution ID and status rather than the final output. This is because workflows may contain long-running nodes (e.g., approval tasks, delayed actions).
{
"executionId": "8259f852-1eac-4a1d-842f-bdb1ac9077ec",
"result": {
"status": "SUCCESSFUL"
}
}The executionId can be used to track the workflow execution in the monitoring dashboard. To receive the final workflow output, add an API node in your workflow to call back to your system with the results once processing completes.
Advanced Settings
The Input Node supports advanced configuration options for customizing data handling:
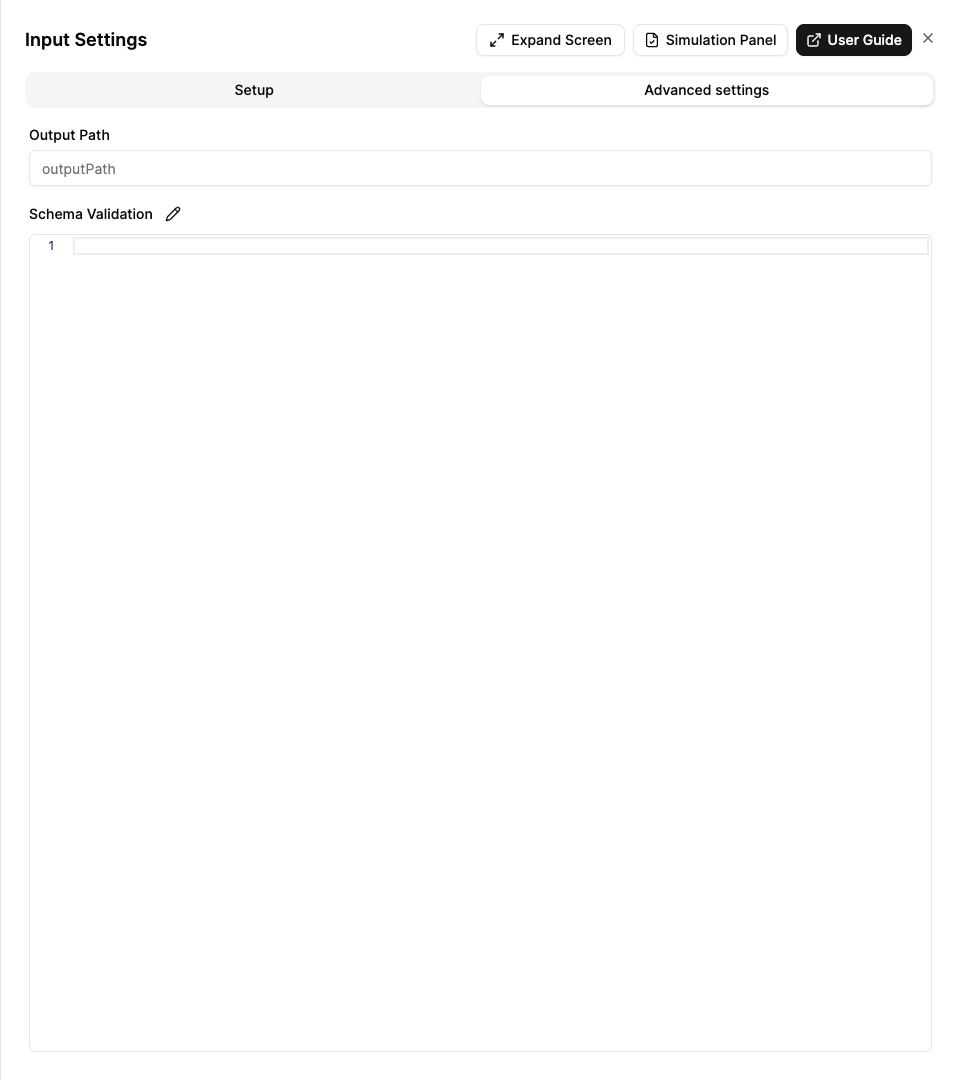
Output Path
Customize where the trigger output is stored in the data context. By default, the input data is available directly at the root level. Setting an output path wraps the input data in a nested structure.
Example: Setting output path to request.payload transforms:
{ "name": "John" }Into:
{
"request": {
"payload": {
"name": "John"
}
}
}Schema Validation
Define a JSON schema to validate incoming trigger data. The workflow will reject requests that don’t match the schema, ensuring data quality and preventing invalid inputs from being processed.
Example JSON Schema:
{
"type": "object",
"required": ["applicantName", "applicationId"],
"properties": {
"applicantName": {
"type": "string"
},
"applicationId": {
"type": "string"
},
"amount": {
"type": "number",
"minimum": 0
}
}
}For more details on advanced settings, see Advanced Settings.
Mock Output
During development and testing, you can configure mock output data to simulate API calls without making actual requests. This is useful for:
- Testing workflow logic during development
- Simulating different input scenarios
- Demonstrating workflows without external dependencies
To enable mock output:
- Open the Input Node settings
- Navigate to the Mock Output section
- Enable the Mock Output toggle
- Enter your mock JSON data in the editor
- Use the Simulate feature to test your workflow with this mock data
Tip: Mock output is only used during simulation mode. Once deployed and published, the workflow will always use real API request data, regardless of the mock output configuration.
Example Requests
Staging Environment
curl -X POST \
'https://lite.staging.oes.opus.gov.sg/api/workflow/my-namespace/my-project/my-workflow?branch=main' \
-H 'Authorization: Bearer <your-staging-token>' \
-H 'Content-Type: application/json' \
-d '{
"applicantName": "John Doe",
"applicationId": "APP-12345",
"amount": 5000
}'Production Environment with Identifier
curl -X POST \
'https://lite.production.oes.opus.gov.sg/api/workflow/my-namespace/my-project/my-workflow?branch=release/1.0.0&identifier=batch-001' \
-H 'Authorization: Bearer <your-production-token>' \
-H 'Content-Type: application/json' \
-d '{
"applicantName": "Jane Smith",
"applicationId": "APP-67890",
"amount": 10000
}'Workflow Triggered by Another Workflow
The Input Node is commonly used when one workflow needs to trigger another workflow. Use the Workflow Node to call another workflow that has an Input Node as its trigger.
{
"sourceWorkflow": "parent-workflow",
"processedData": {
"applicantName": "John Doe",
"verificationStatus": "approved"
},
"timestamp": "2026-03-08T10:30:00Z"
}When to Use It?
Use Input Node when:
- You need a generic, flexible trigger that accepts any JSON structure
- Your workflow is called programmatically from external systems or applications
- You are integrating with custom APIs or internal systems
- One workflow needs to trigger another workflow
- You are building scheduled automation (triggered by external schedulers like cron jobs)
- You need full control over the input data structure without platform-specific constraints
- You want to test and iterate quickly without configuring external integrations
Consider specialized trigger nodes when:
- FormSG: Use FormSG Trigger for secure government form submissions
- CFT: Use CFT Trigger for Cloud File Transfer events
- ApplySG: Use ApplySG Trigger for application management platform integrations
- GovRewards: Use GovRewards Trigger for reward redemption events
- Ownself Gather: Use Ownself Gather Trigger for customer relationship management events
Tip: The Input Node is the most versatile trigger option. When in doubt, start with the Input Node and migrate to a specialized trigger node only if you need platform-specific features or data transformations.