Migration for sandbox (trial) users
Below are the steps for manually migrating from Workflow Sandbox (trial) to Workflow. If you would like support in migration, please speak to the team.
Prerequisites
- Existing Workflow Sandbox (trial) user
- An existing Workflow account. If you don’t have one, please sign up.
Step 1: Export and import Decision or Workflow file
We will make use of the file import and export feature. Note: This can only be done with one file at a time.
- Log in to your Workflow Sandbox (trial) account.
- Inside your project folder, click on the Workflow or Decision file to migrate.
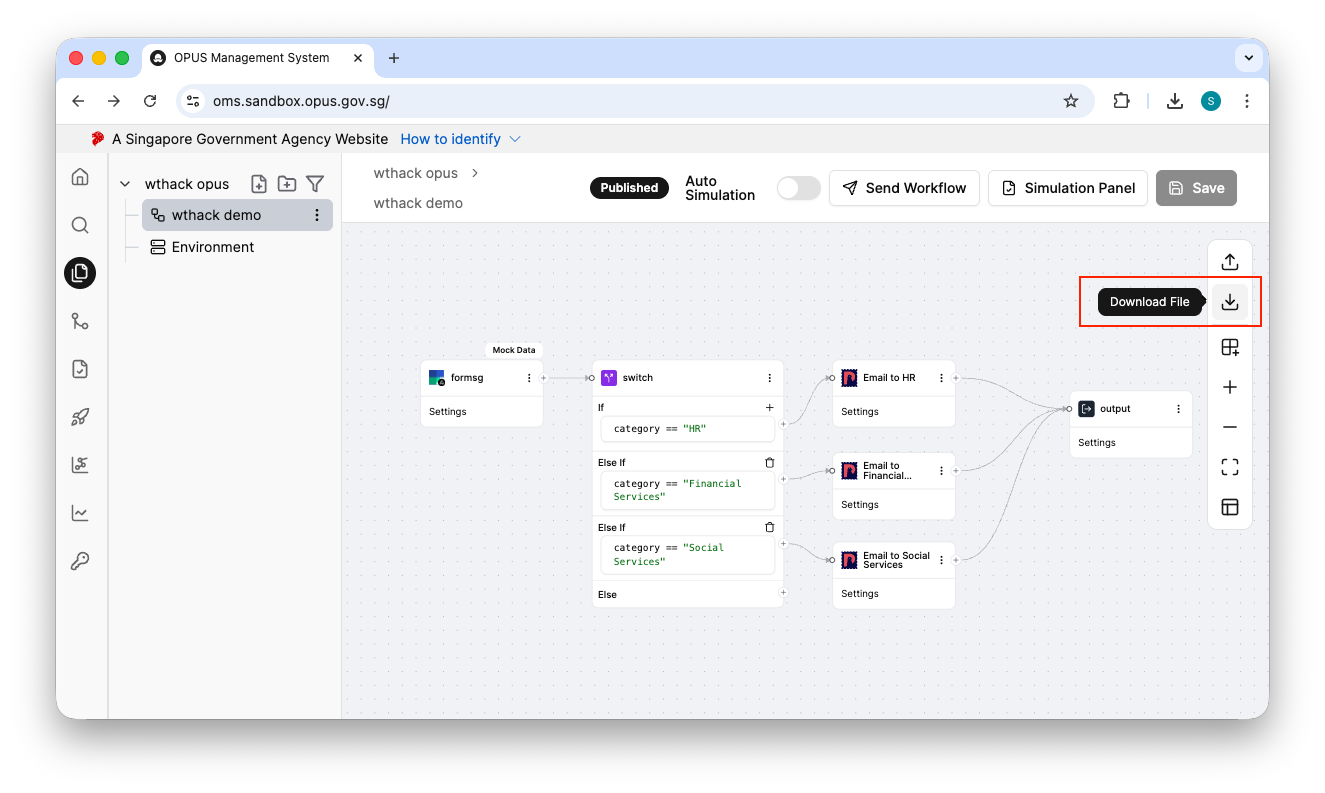
- On the right panel tools selector, click on the Download File icon.
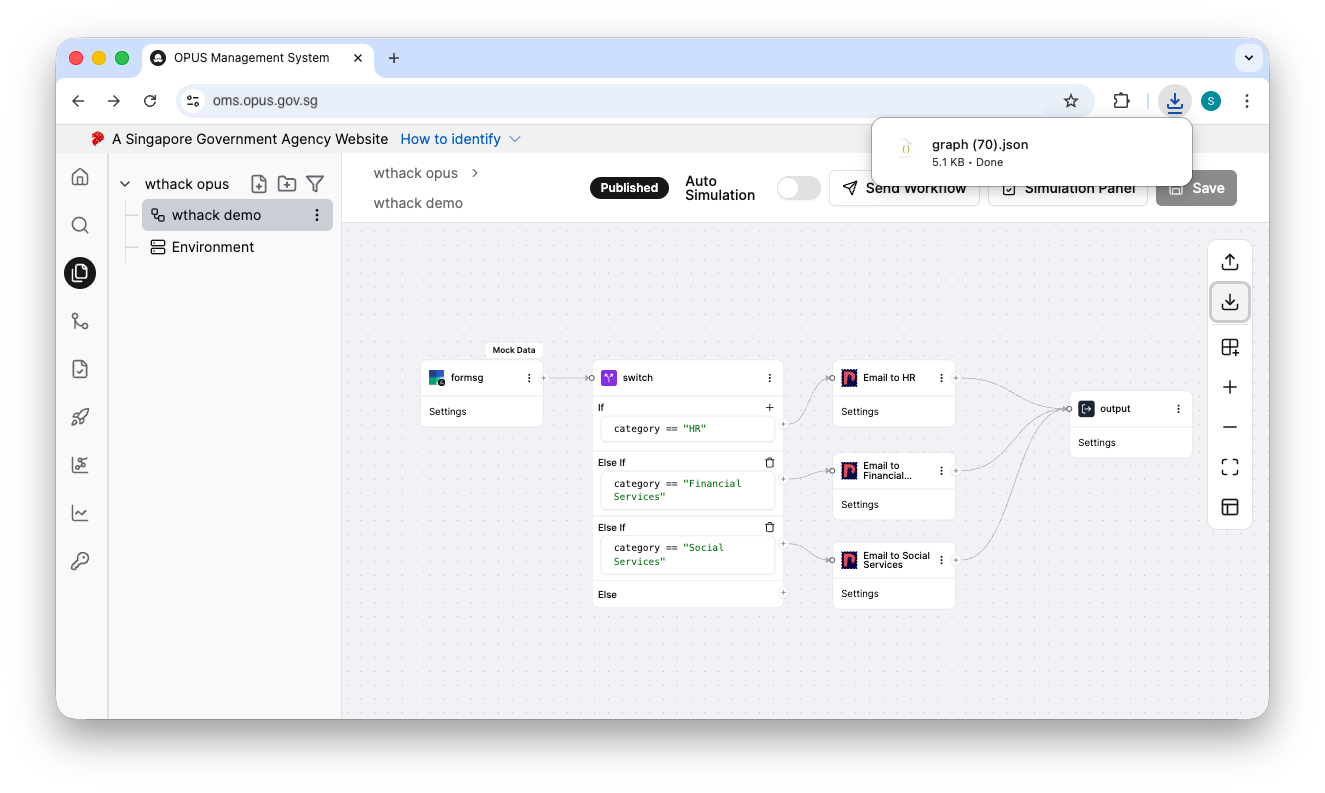
- You will have a JSON file inside your selected Downloads folder.
- Log in to your Workflow account.
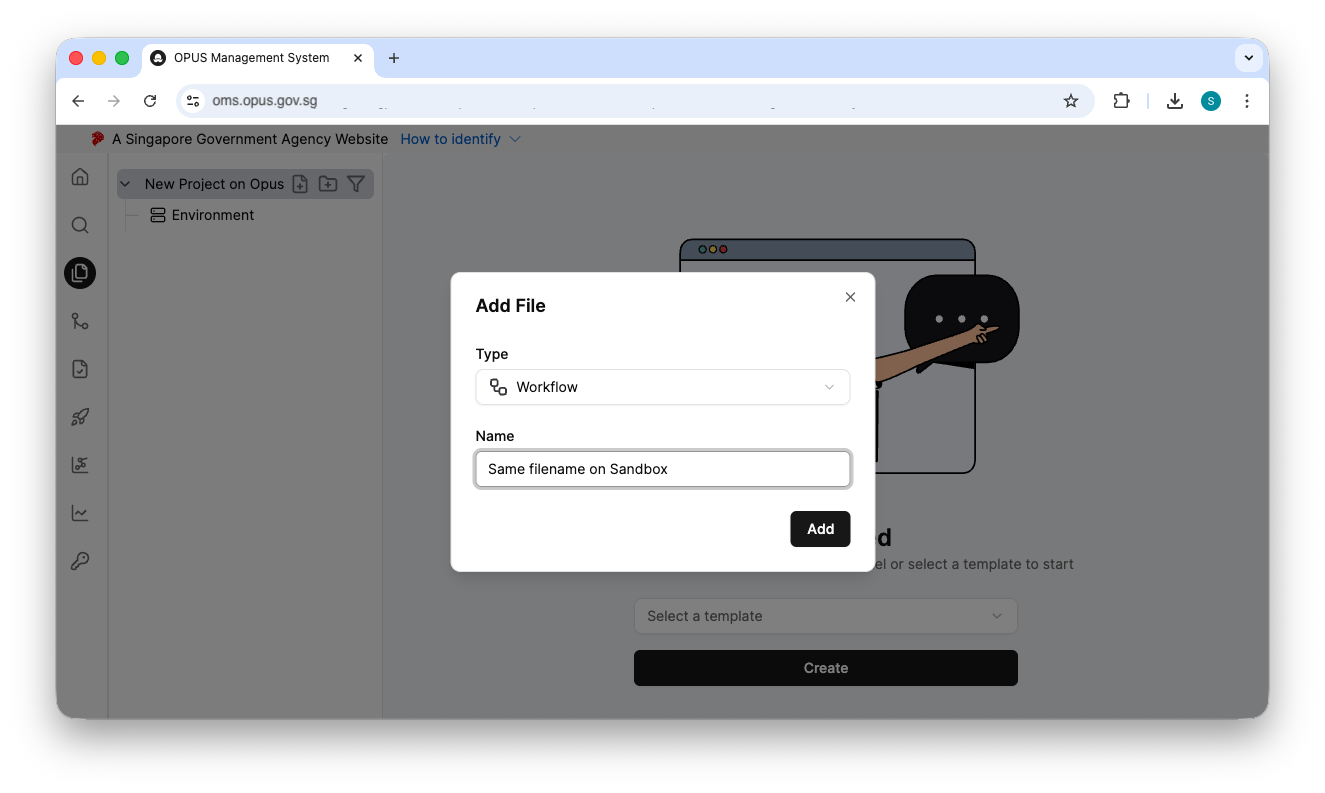
- Inside your project folder, click on Add File.
- Select the same file type as the migrated file, Workflow or Decision.
- Give a file name and click Add.
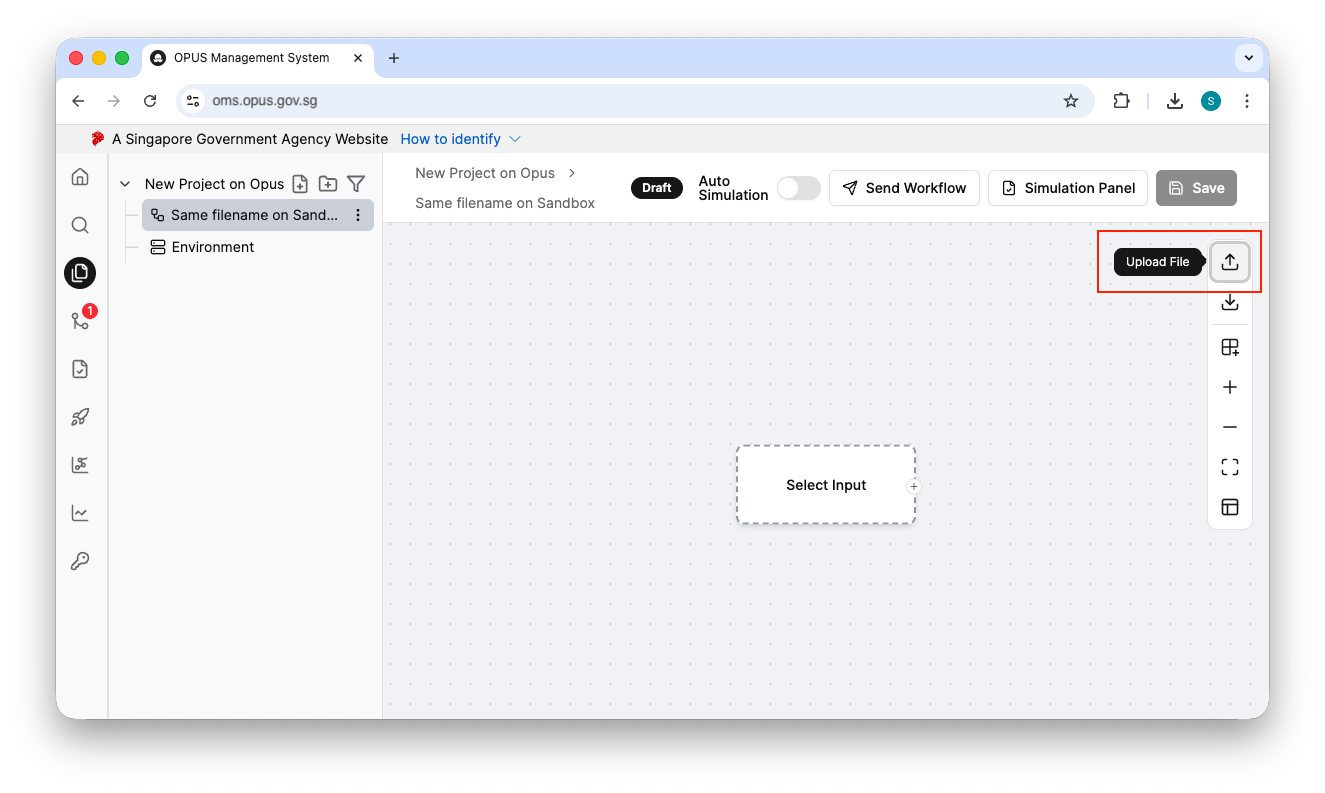
- Click on Upload File.
- Navigate to the downloaded JSON file, click on Open.
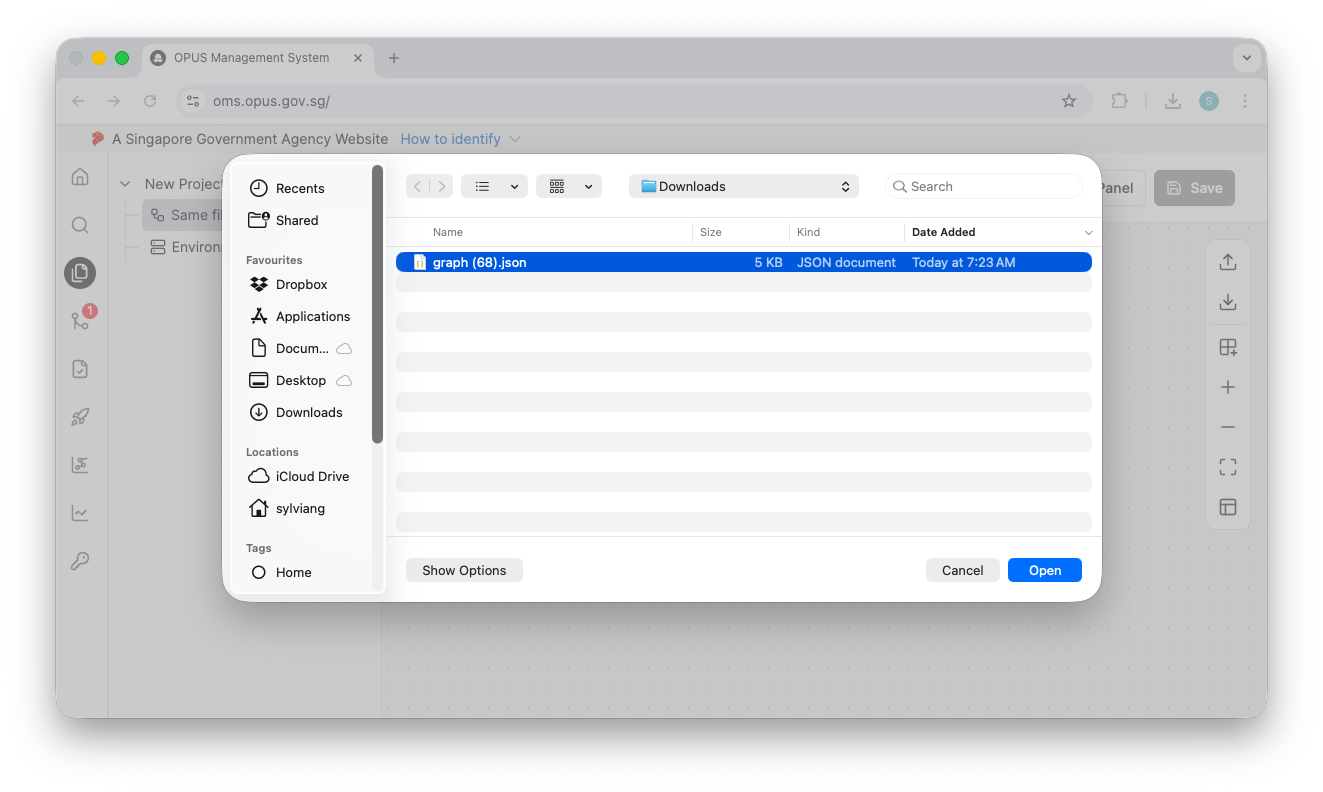
- You will then see a success message that says “Graph imported successfully”.
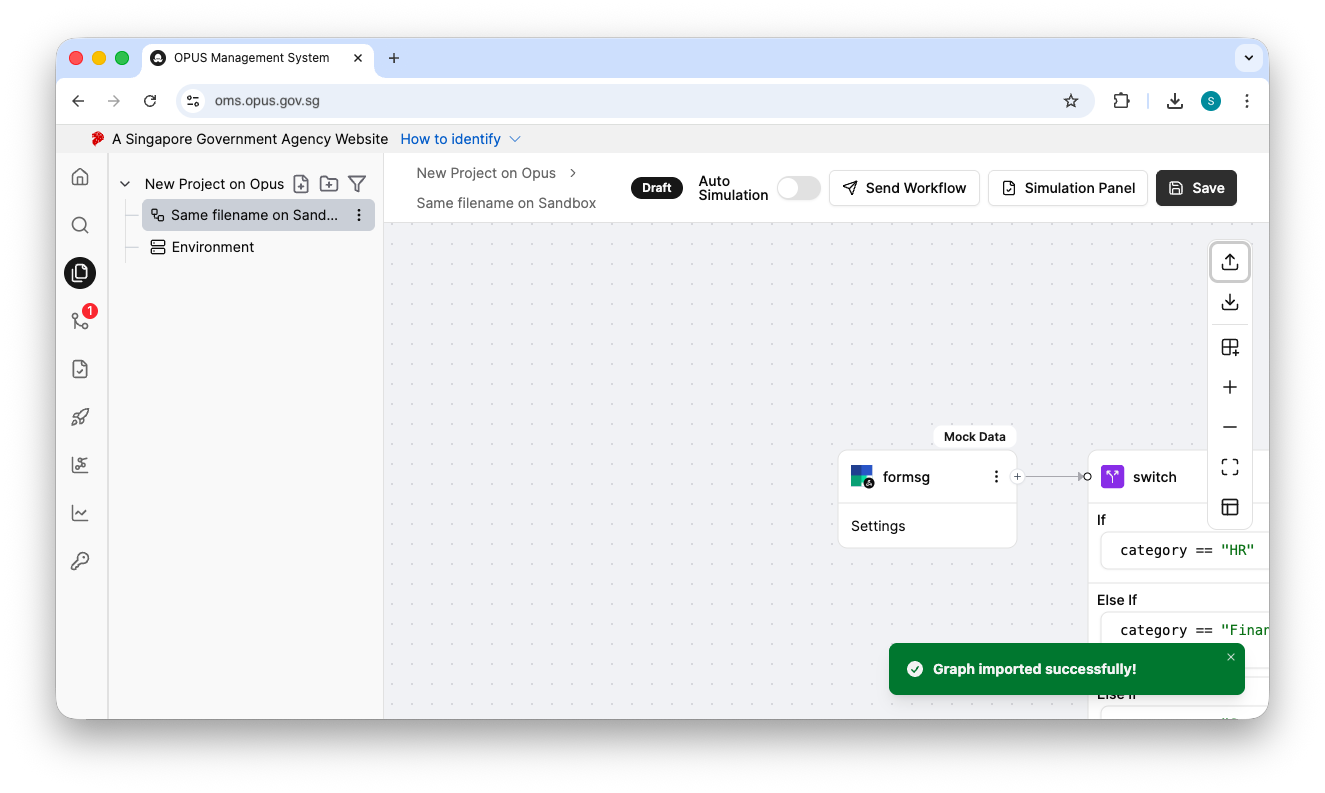
- Click Save on the top right-hand corner.
- Repeat above steps 2 to 12 for the next file.
Step 2: Update external system webhook
If your external systems (i.e., FormSG, Ownself Gather) are configured to call your Workflow Sandbox endpoints, you will need to update them to point to the new Workflow endpoints.
- Identify all external systems that reference your Workflow Sandbox endpoints.
- Log in to the external system (i.e., FormSG, Ownself Gather).
- Navigate to the webhook or endpoint configuration (i.e., FormSG > Settings > Webhook).
- Replace the Sandbox endpoint URL with the new Workflow endpoint URL.
- Save the changes and verify the connection.
Step 3: Update the reference file inside Decision node and Workflow node
If you use Decision or Workflow node inside your graph, the node references are not included in the exported JSON. Hence, after importing your files, you will need to update any node references that point to a Decision file or Workflow file.
- Select the imported file in your Workflow account to view the graph.
- Identify the nodes that reference a Decision file or a Workflow file.
- Click on the node settings to open its configuration panel.
- Re-select the correct Decision or Workflow file from your new project.
- Repeat for all nodes with Decision or Workflow references.
- Click Save on the top right-hand corner.
Step 4: Copy over environment variables
If you use environment variables, the environment variables are not included in the exported JSON. You will need to manually re-create them in your new Workflow account.
- In your Workflow Sandbox (trial) account, navigate to the Environment Variables section of your project.
- Take note of the variable names and values.
- In your Workflow account, navigate to the Environment Variables section of your project.
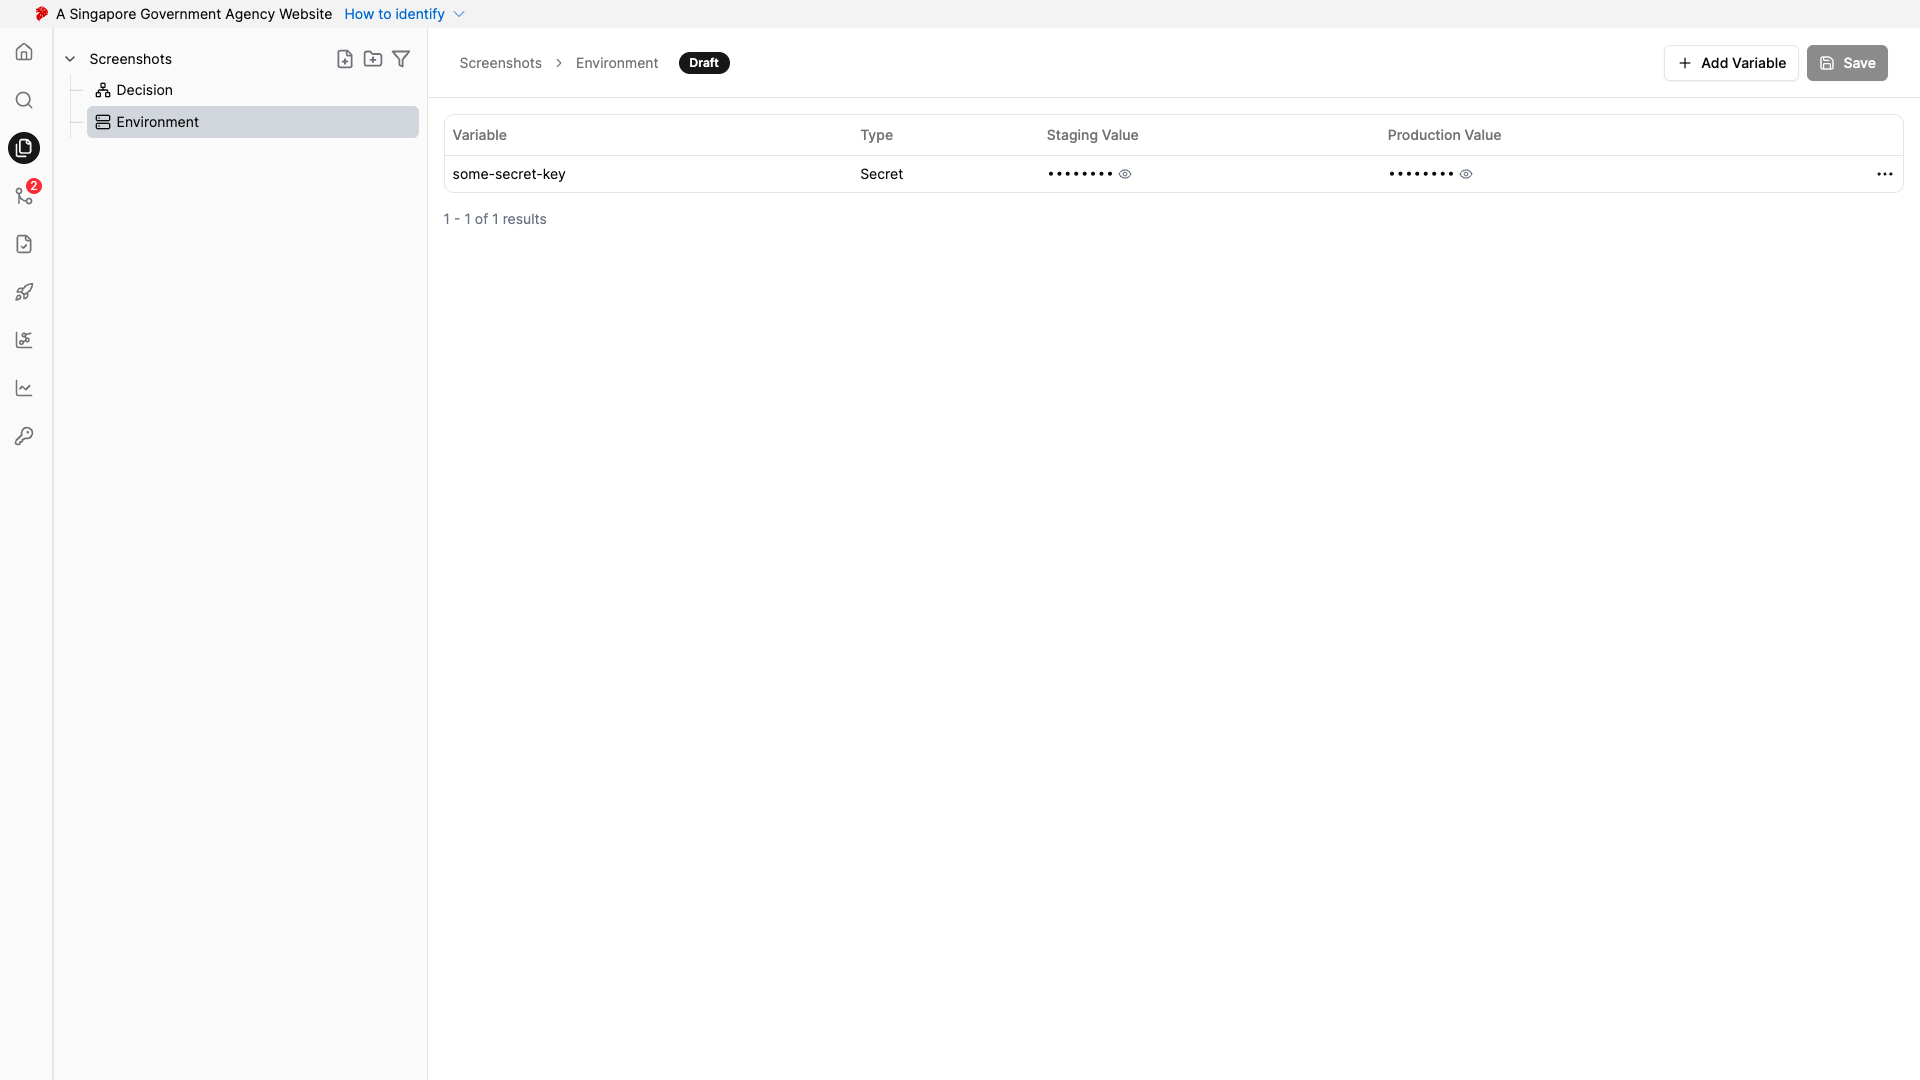
- Click Add Variable and enter each variable name and value.
- Repeat for all environment variables.
- Click Save on the top right-hand corner.
Step 5: Download and upload Decision test suites
If you have test suites for your Decision files, you will need to download them from Workflow Sandbox and upload them to your new Workflow account.
- In your Workflow Sandbox (trial) account, open the Decision file that has test suites.
- Click on the Simulation Panel.
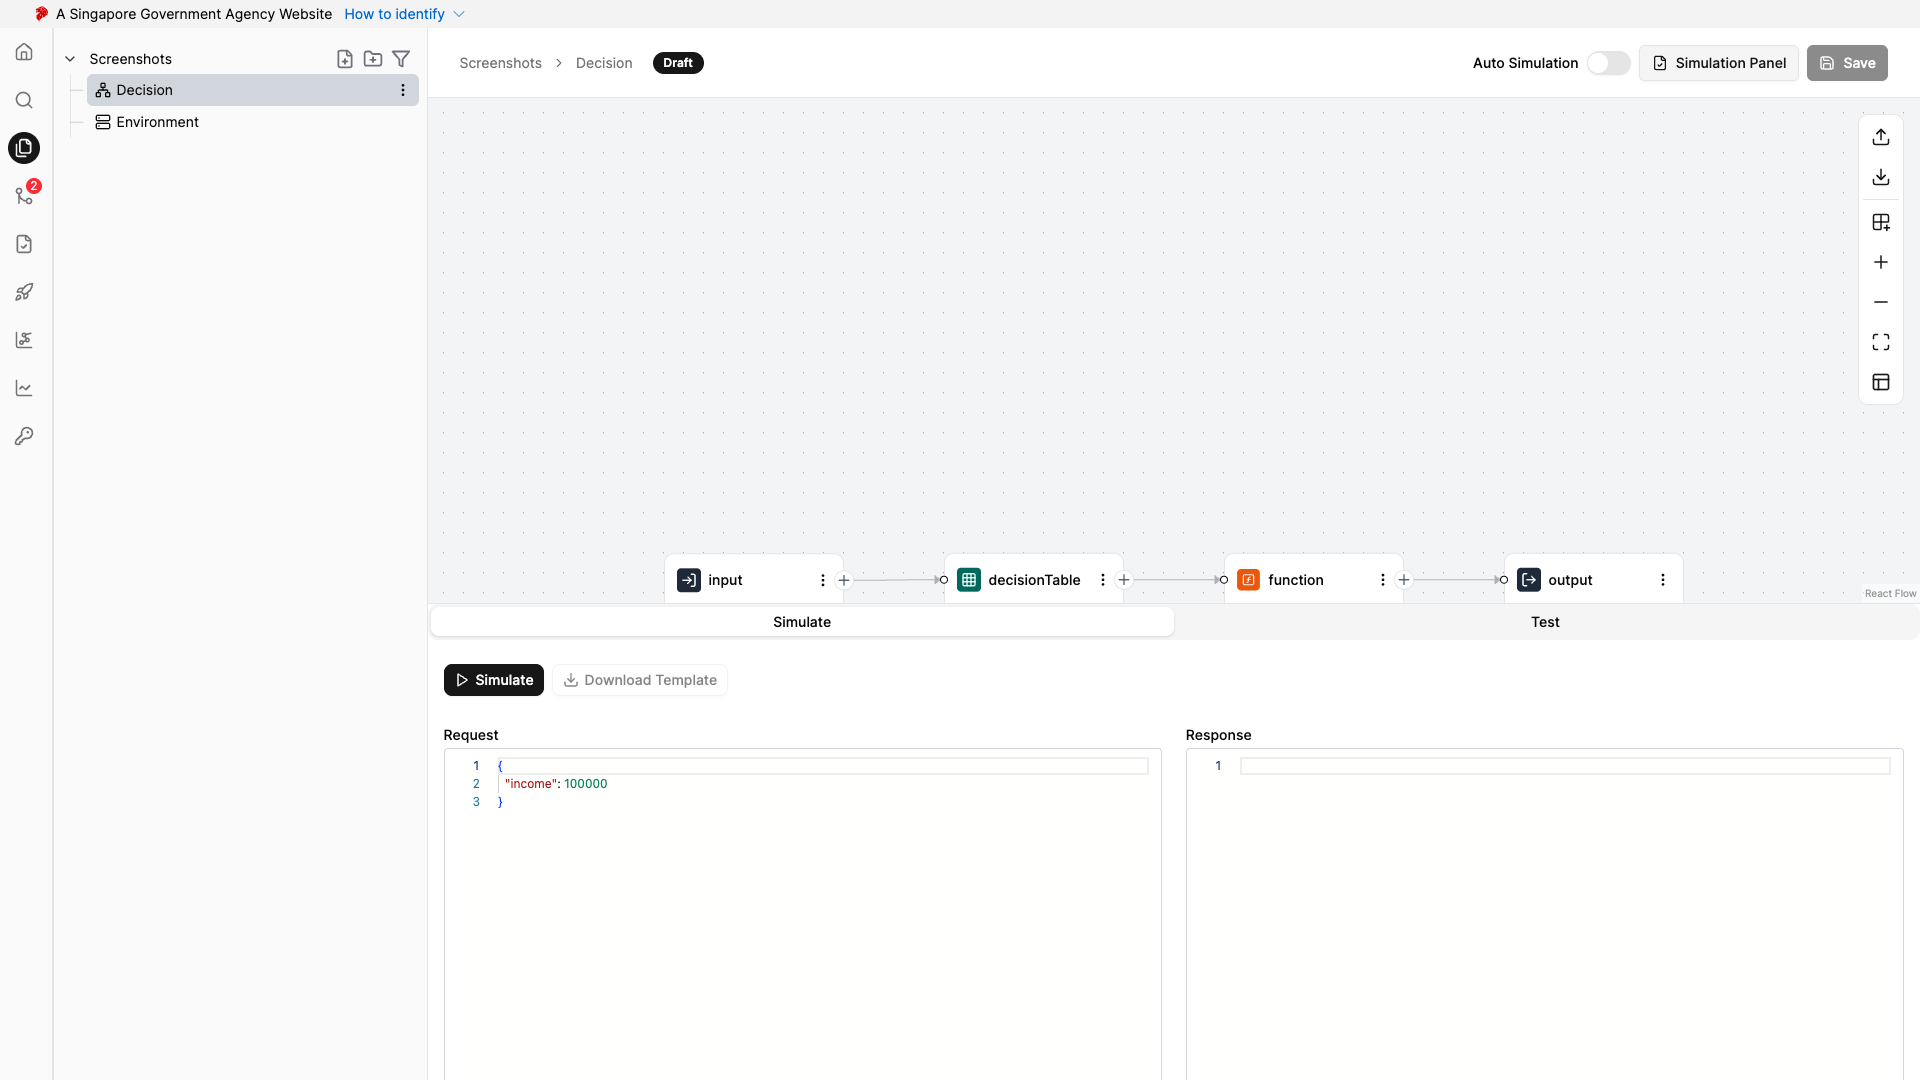
- Navigate to the Test tab.
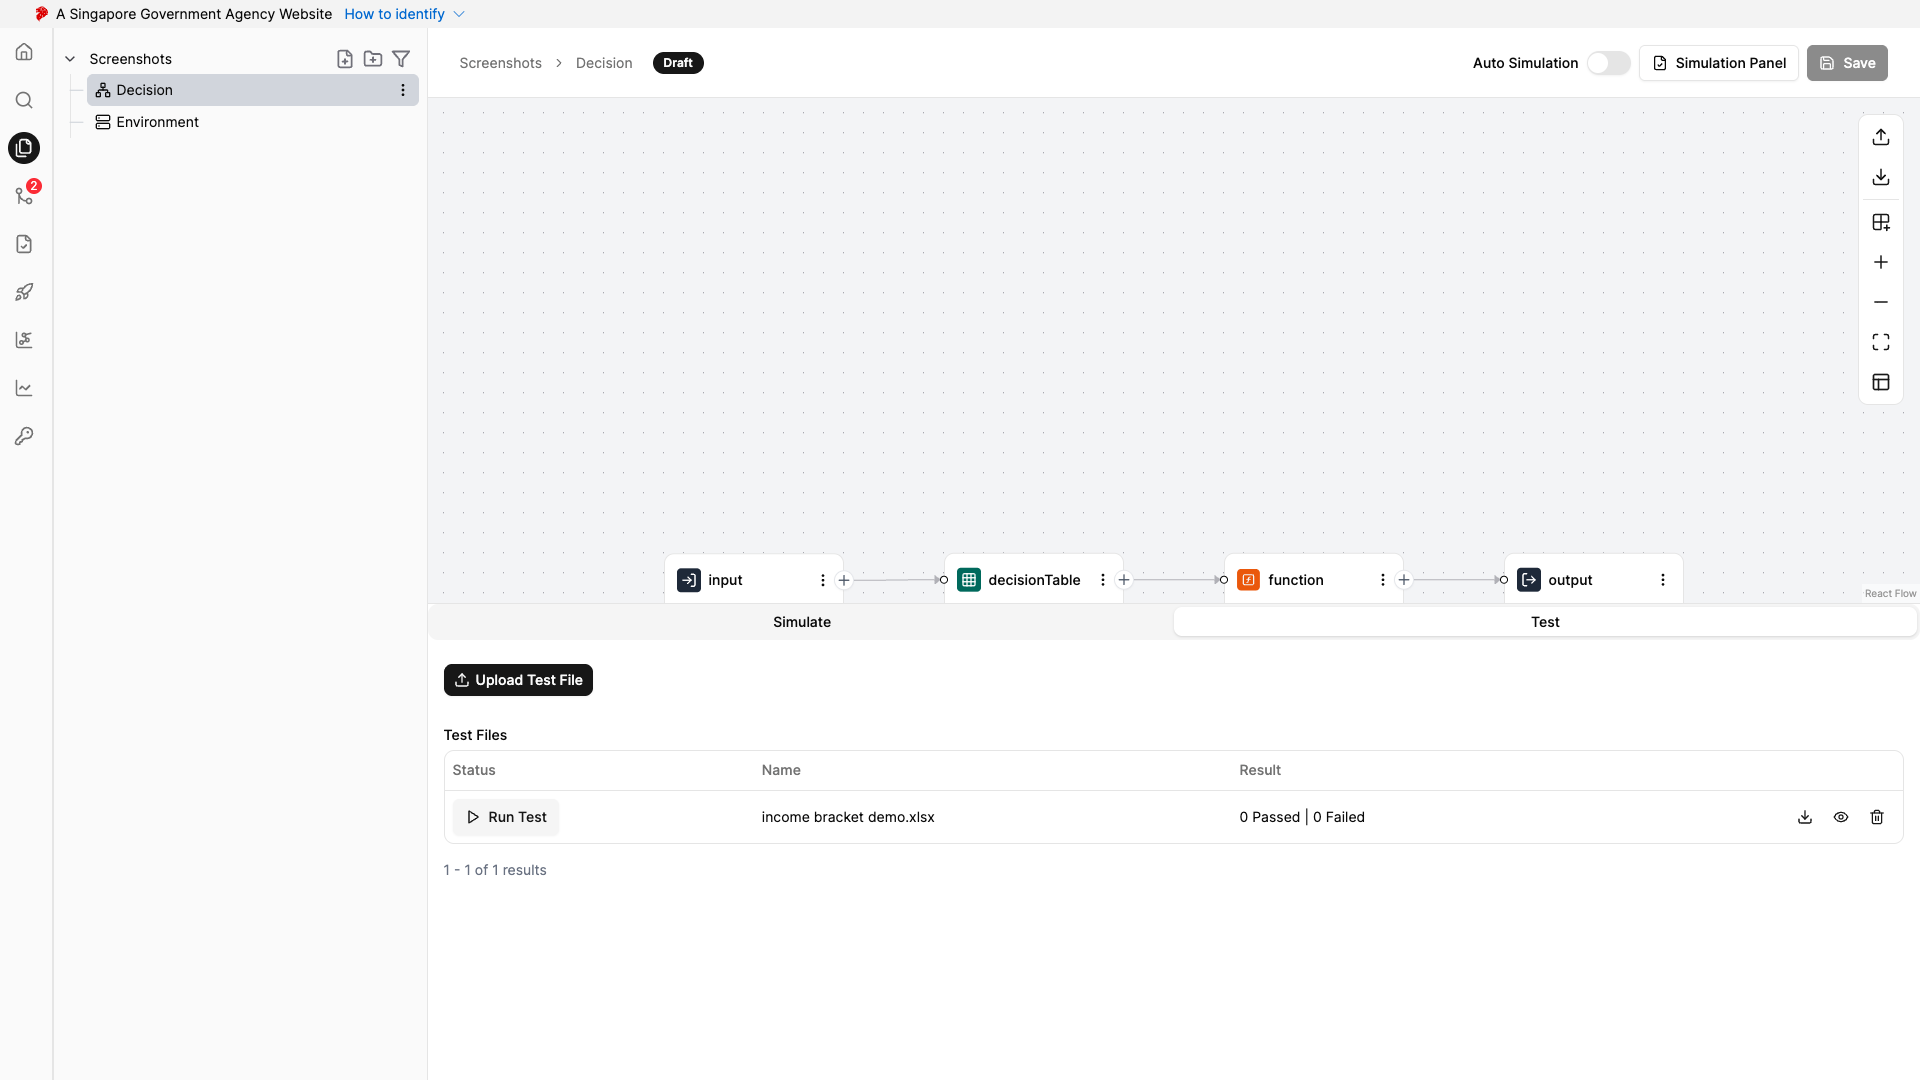
- For each test suite, click Download to export the test suite.
- In your Workflow account, open the corresponding Decision file.
- Click on the Simulation Panel and navigate to the Test tab.
- Click Upload to import the test suites.
- Click Save on the top right-hand corner.
- Repeat for all Decision files with test suites.
Step 6: Update simulation payloads
If you have simulation payloads in your files, they are not included in the exported JSON. You will need to copy them in your new Workflow account.
- In your Sandbox (trial) account, open the Decision or Workflow file.
- Click on the Simulation Panel.
- Open the payload from the Request editor and copy the simulation payload.
- In your new account, open the corresponding Decision or Workflow file.
- Click on the Simulation Panel and open the Request editor.
- Paste the simulation payload into the editor.
- Click Save on the top right-hand corner.
- Repeat for all Decision or Workflow files with simulation payloads.
Step 7: Remember to publish your work to save a version in history
- Refer to the instructions in Publish Changes