Create your application
Part I: Create your first application on CStack
- Create a new subgroup and obtain Owner permissions on GitLab.
Creating subgroups allows you to manage multiple application repositories.
Note: You will be able to delete repositories a.k.a projects.
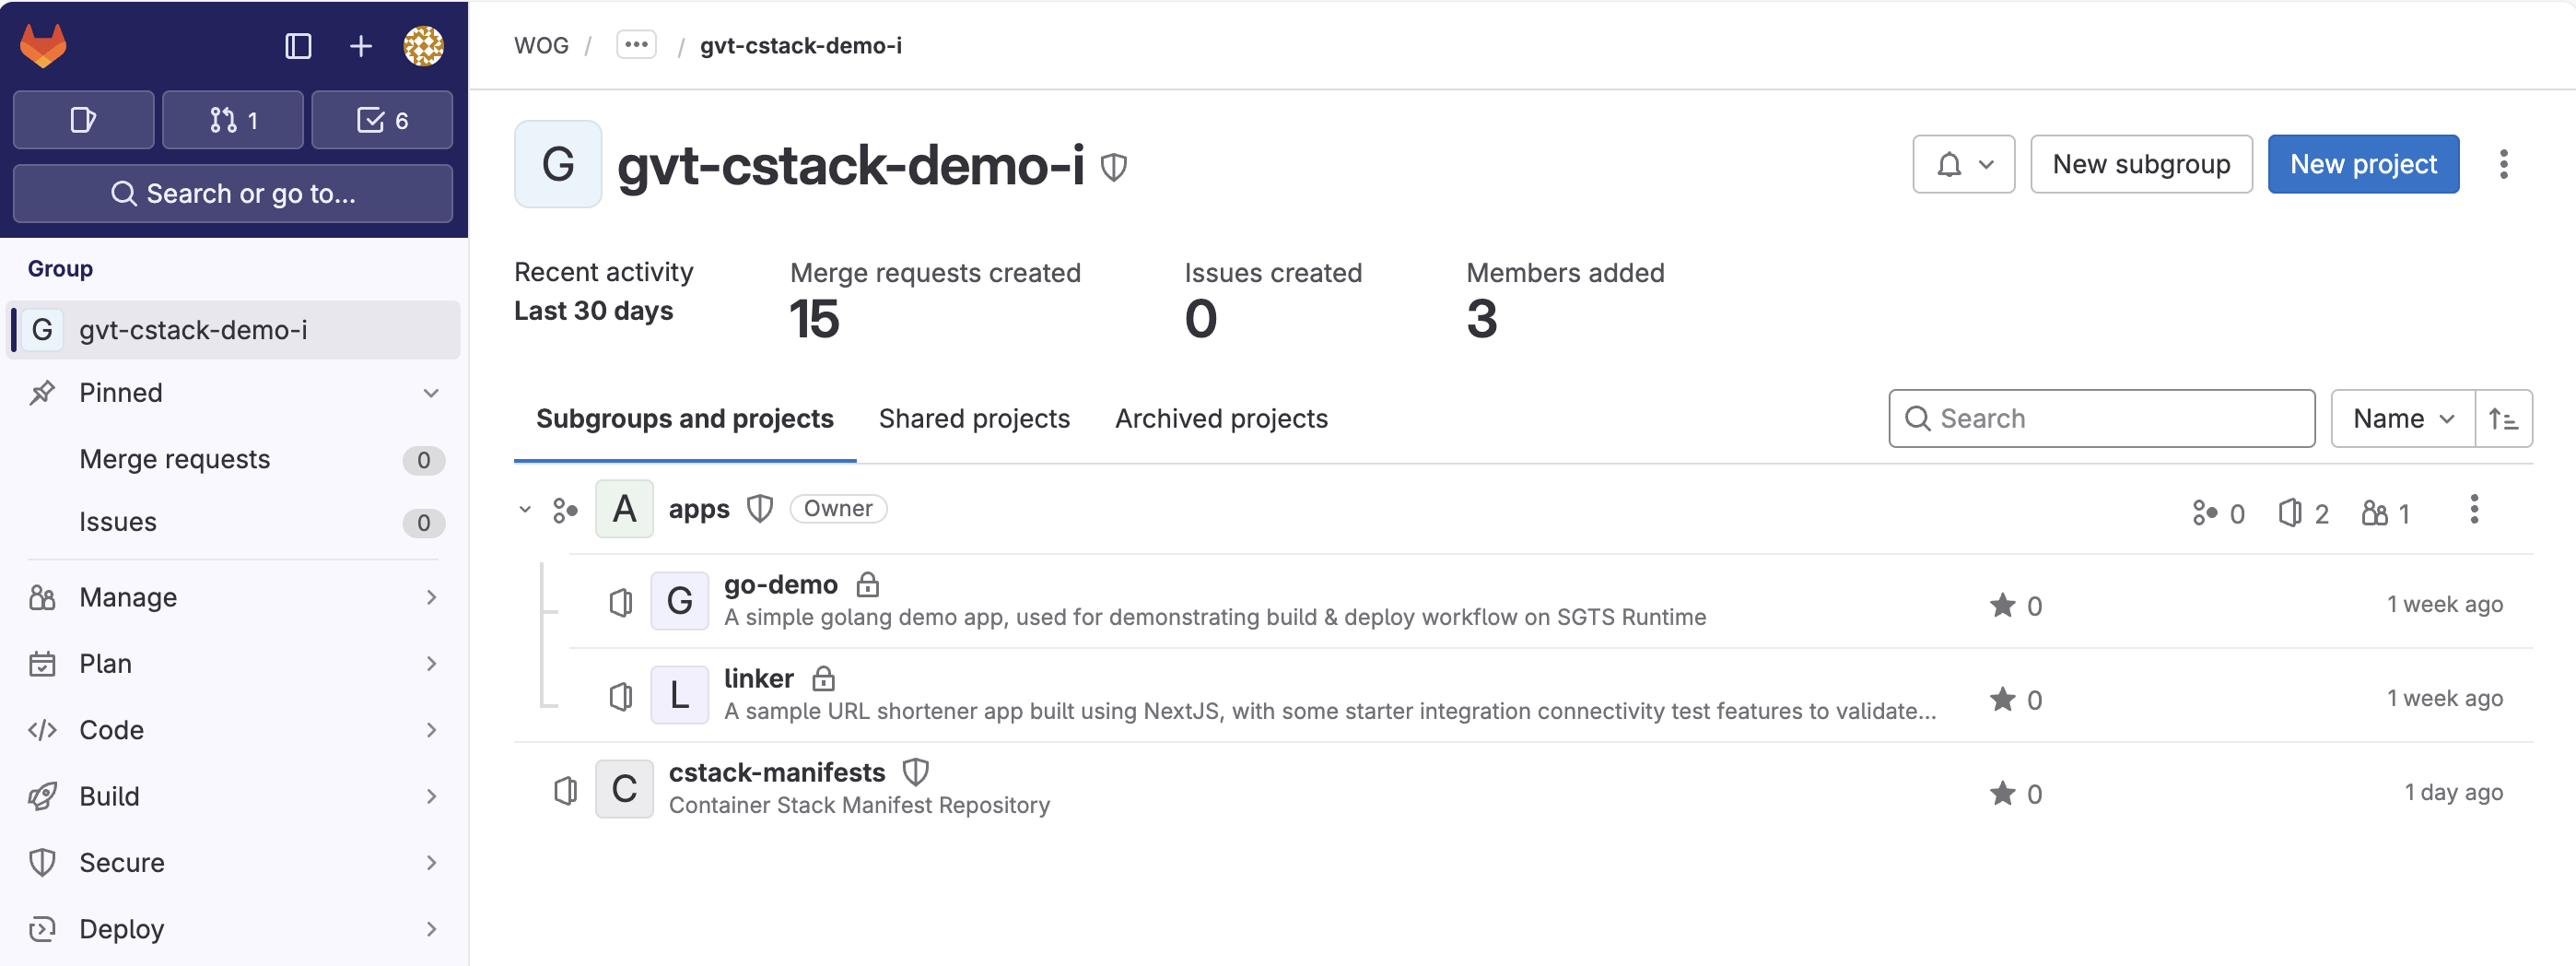
When you onboard to GitLab for CStack, you will only be granted Maintainer permissions under your assigned group. However, you will have Owner permissions for subgroups you create. Hence, it is recommended that you create your application repositories under the subgroups you own. (This will allow you to self-service and manage the code repositories if you decide you want to delete them)
An example is shown in the screenshot below. Each repository builds into a single container image.
- Add a
.gitlab-ci.ymlfile to your application repository
After creating your subgroup for apps and creating your first project repository, add the following .gitlab-ci.yml file to your application repository.
include:
- project: wog/gvt/cstack/groups/references/pipelines/tenant-pipeline
ref: main
file: single-container/.gitlab-ci.ymlThis pipeline definition is maintained by CStack and it will provide base pipeline that builds, scans, and pushes the container image to a private registry managed by CStack.
Note: This assumes that you have a Dockerfile in your application repository for the build.
Part II: Build a Container Image
Make a change in your code, commit it to the repository and merge to
mainbranch.This will trigger a pipeline to build and push the container image. Two pipelines will run:
- MR pipeline - You may choose to ignore this. Proceed to merge and trigger tenant pipeline.
- tenant pipeline - The base pipeline that builds and pushes to a managed ECR.
Find and copy the container image tag in the pipeline logs for
“push image”job. This will be used in next steps.